Xamarin.Android SnackBar Example
Contents
In this article, I will take a closer look at the SnackBar structure in Xamarin.Android applications. The SnackBar structure is used at the bottom of the screen to inform the user or to interact with the user.
Although SnackBar functionally resembles Toast messages, it stands out with a few features. For example, we can add a button to the SnackBar, or we can drag it away from the screen whenever we want. In addition, we can change the text color and size as we wish in order to be compatible with the layout design. With this structure, Toast is separated from the message and becomes a more useful structure.
Considering these features, using Snackbar for an effective user experience will undoubtedly take your application one step ahead.
1) Create a Layout
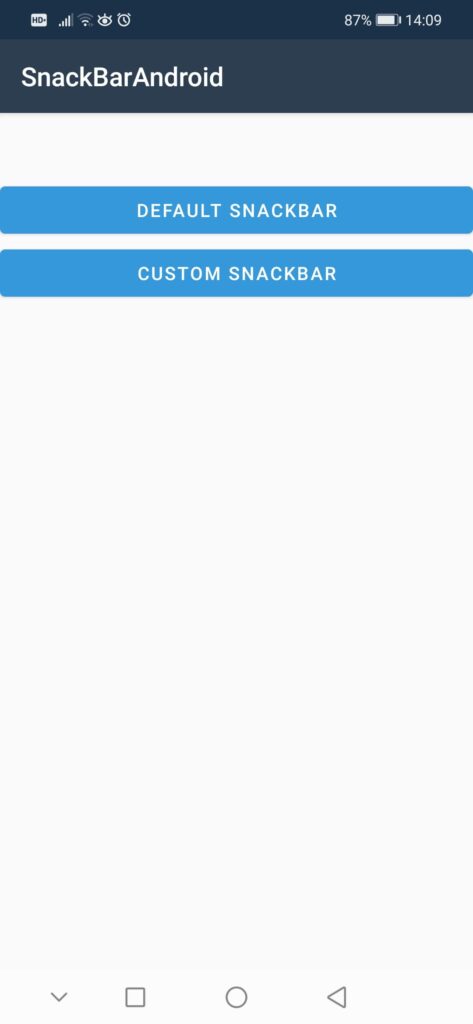
First, add a layout called snackbar_layout.xml to your application. Then add 2 buttons named “Default SnackBar” and “Custom SnackBar” to this layout.
snackbar_layout.xml codes:
<?xml version="1.0" encoding="utf-8"?>
<LinearLayout
    xmlns:android="http://schemas.android.com/apk/res/android"
    xmlns:app="http://schemas.android.com/apk/res-auto"
    xmlns:tools="http://schemas.android.com/tools"
    android:layout_width="match_parent"
    android:orientation="vertical"
    android:layout_height="match_parent"
    android:paddingTop="50dp">

    <Button
        android:layout_width="match_parent"
        android:layout_height="wrap_content"
        android:text="Default SnackBar"
        android:id="@+id/default_snackbar_action"/>
     <Button
        android:layout_width="match_parent"
        android:layout_height="wrap_content"
        android:text="Custom SnackBar"
        android:id="@+id/custom_snackbar_action"/>
</LinearLayout>
The layout will look like this:
2) Create the SnackBar View
Then create an activity named SnackBarActivity for this layout.
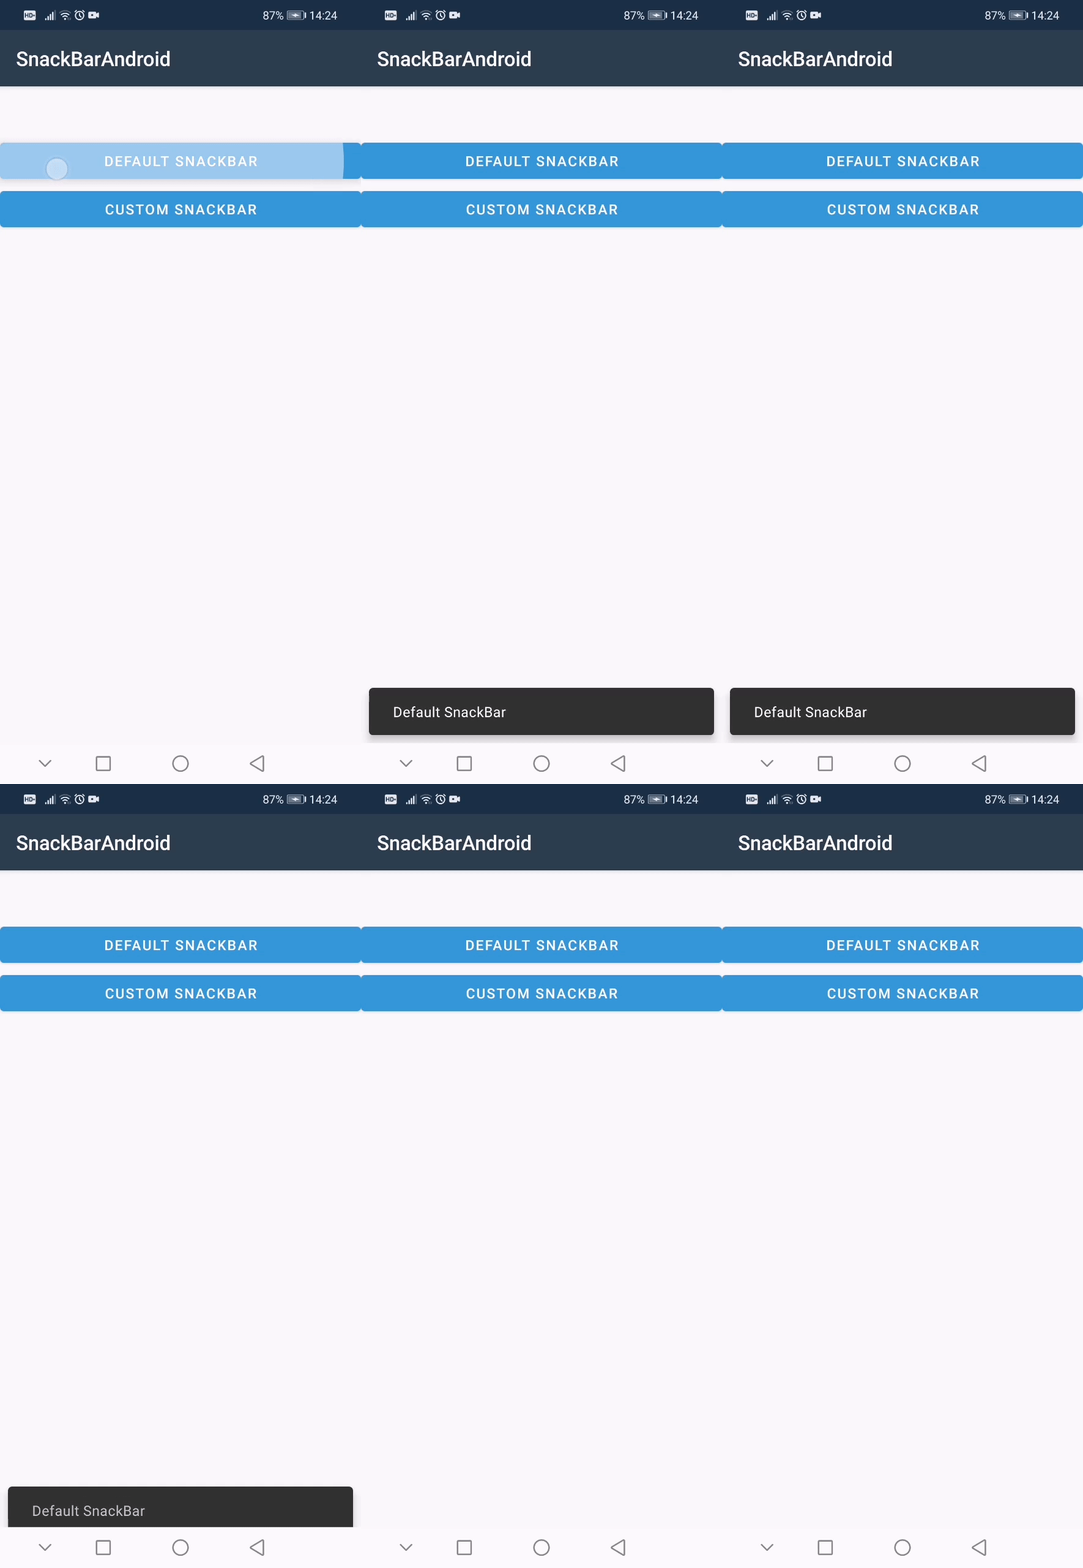
Now first define Default SnackBar button and click event. Then create a Snackbar object with the Make() method and finally display it on the screen with the Show() method.
Here you can set the duration of the SnackBar in 3 different ways:
- LengthShort : Short-term display.
- LengthLong : Long-term display.
- LengthIndefinite : Indefinite display. In this example project, I set the duration as LengthIndefinite and then I made the SnackBar appear 1000ms(1s) with the SetDuration() method.
public class SnackBarActivity : AppCompatActivity
{
    Button default_snackbar_button;
    protected override void OnCreate(Bundle savedInstanceState)
    {
        base.OnCreate(savedInstanceState);
        Xamarin.Essentials.Platform.Init(this, savedInstanceState);
        // Set our view from the "main" layout resource
        SetContentView(Resource.Layout.snackbar_layout);
        default_snackbar_button = FindViewById<Button>(Resource.Id.default_snackbar_action);
        default_snackbar_button.Click += Default_snackbar_button_Click;
    }

    private void Default_snackbar_button_Click(object sender, System.EventArgs e)
    {
        //Create the Snackbar
        Snackbar default_snackBar = (Snackbar)Snackbar.Make(default_snackbar_button, "Default SnackBar", Snackbar.LengthIndefinite)
             .SetDuration(1000);
        //Show the snackbar
        default_snackBar.Show();
    }

    public override void OnRequestPermissionsResult(int requestCode, string[] permissions, [GeneratedEnum] Android.Content.PM.Permission[] grantResults)
    {
        Xamarin.Essentials.Platform.OnRequestPermissionsResult(requestCode, permissions, grantResults);

        base.OnRequestPermissionsResult(requestCode, permissions, grantResults);
    }
}
When you run the application and click the button, you will get a disappearing view for 1 second:
3) Customizing the SnackBar Element
Here, too, first define the Custom SnackBar button and its click event.
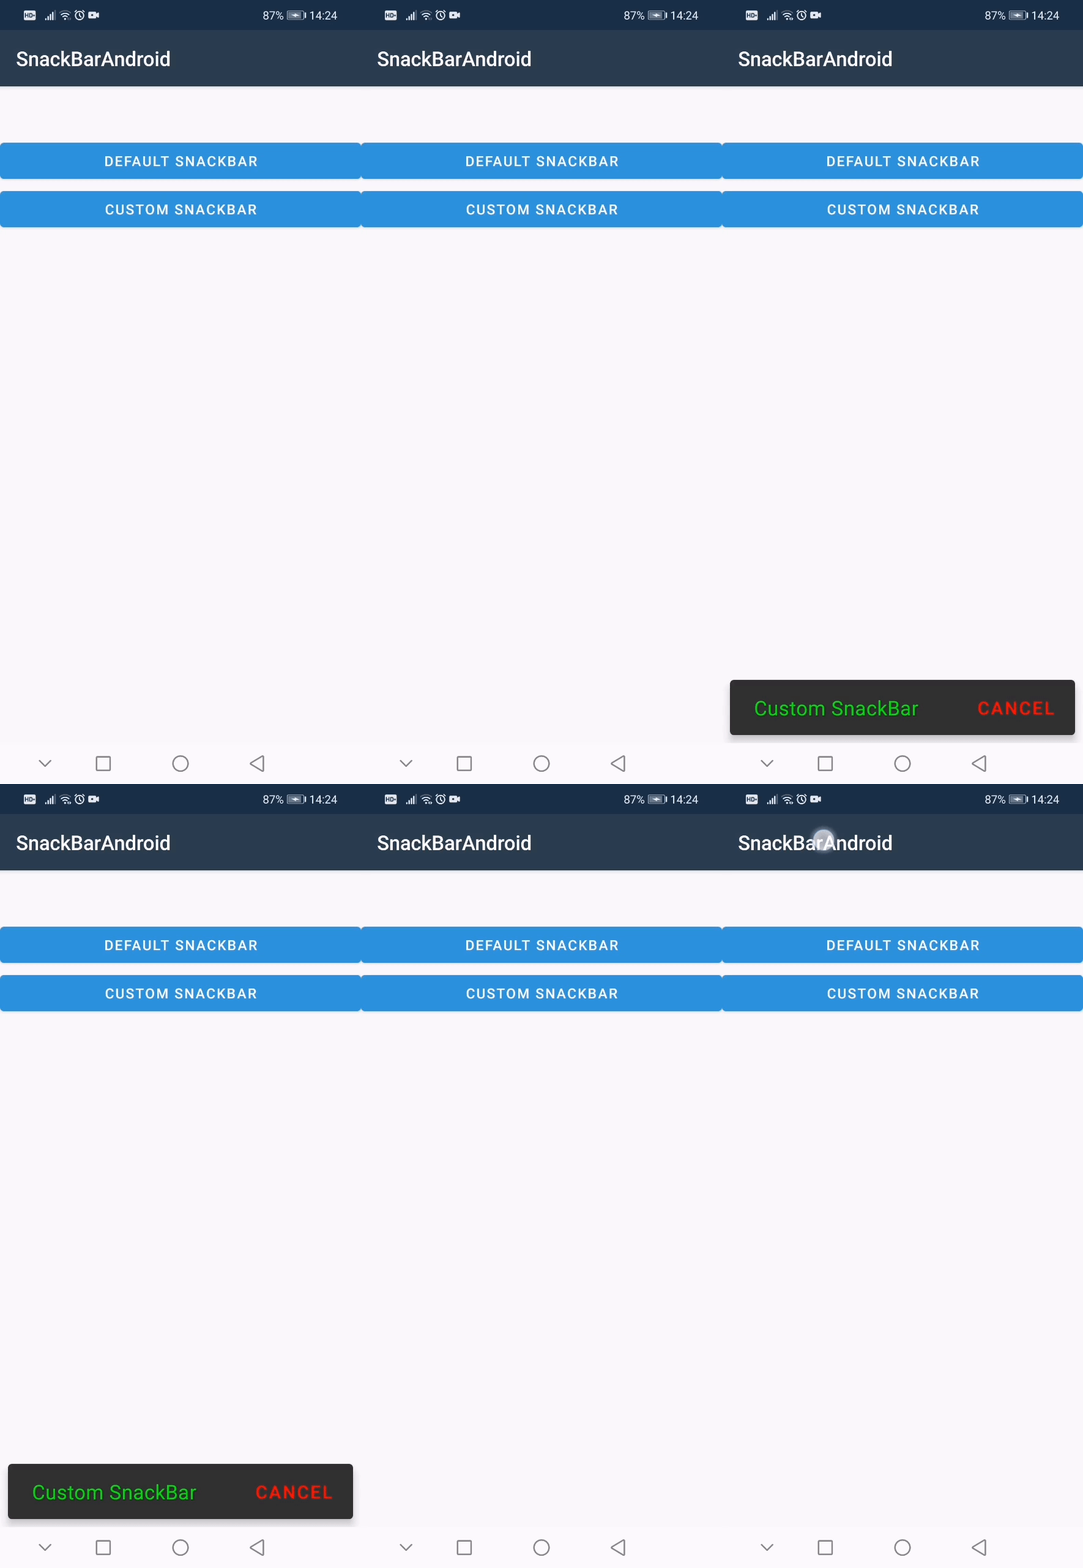
Then create a SnackBar with the Make() method and the SetAction() method to define the button name and the events that will occur when the button is clicked.
Later on,
- Set the text color of the button that will appear on the SnackBar with the SetActionTextColor() method,
- the text size of the button with the SetTextSize() method,
- the color of the message that will be displayed with SetTextColor(),
- and the size of the message that will be displayed with SetTextSize().
Then show it with the Show() method.
public class MainActivity : AppCompatActivity
{
    Button custom_snackbar_button;
    protected override void OnCreate(Bundle savedInstanceState)
    {
        base.OnCreate(savedInstanceState);
        Xamarin.Essentials.Platform.Init(this, savedInstanceState);
        // Set our view from the "main" layout resource
        SetContentView(Resource.Layout.snackbar_layout);
        custom_snackbar_button = FindViewById<Button>(Resource.Id.custom_snackbar_action);
        custom_snackbar_button.Click += Custom_snackbar_button_Click;
    }

    private void Custom_snackbar_button_Click(object sender, System.EventArgs e)
    {

        //Creates the Snackbar and subscribes the button press event
        Snackbar custom_snackBar = Snackbar.Make(custom_snackbar_button, "Custom SnackBar", Snackbar.LengthIndefinite).SetAction("Cancel", (v) =>
        {
        });

        //set  action button text color
        custom_snackBar.SetActionTextColor(Android.Graphics.Color.Red);

        //Set action button text size
        TextView txtAction = custom_snackBar.View.FindViewById<TextView>(Resource.Id.snackbar_action);
        txtAction.SetTextSize(Android.Util.ComplexUnitType.Dip, 18);

        //Set message text size and color
        TextView txtMessage = custom_snackBar.View.FindViewById<TextView>(Resource.Id.snackbar_text);
        txtMessage.SetTextColor(Android.Graphics.Color.Green);
        txtMessage.SetTextSize(Android.Util.ComplexUnitType.Dip, 20);

        //Show the snackbar
        custom_snackBar.Show();

    }

    public override void OnRequestPermissionsResult(int requestCode, string[] permissions, [GeneratedEnum] Android.Content.PM.Permission[] grantResults)
    {
        Xamarin.Essentials.Platform.OnRequestPermissionsResult(requestCode, permissions, grantResults);

        base.OnRequestPermissionsResult(requestCode, permissions, grantResults);
    }
}
Now when you click the button the SnackBar will appear and when you click the “Cancel” button it will disappear. As you can see, the text color, button color appeared as we set it.
4) Conclusion
In this article, I have explained step by step how to add SnackBar to your Xamarin.Android applications. I hope it was useful.
If you’re still not sure what to do, or if you got any errors, then I suggest you use the comment section below and let me know! I am here to help!
Also, share this blog post on social media and help more people learn.
Resources:
- https://medium.com/corrado-cavalli/add-a-snackbar-to-you-xamarin-android-app-4d321ecb98ff


